Top Posts
Stain Your Deck in the Spring 2025
Best Deck Stain and Sealers 2025
The Best Deck Stains 2025
The Best Epoxy Coating for Garages
Water Based Deck Stains 2025
Types of Concrete Sealers 2025
Deck Staining Myths and Tips 2025
Restore-A-Deck’s Two Step Deck Cleaning Products
How To Stain Your Deck Faster and With...
Where to Buy Defy Deck Stain in Canada?
Deck Stain Guide
The Deck Stain Pros!
  • Home
  • About
  • Deck Staining 101
  • Deck Cleaning
  • Deck Stain Reviews
Author

Clay

Clay

Deck Staining 101

The Best Deck Stains 2025

by Clay February 12, 2025
written by Clay

deck

Updated for 2025 – Best Deck Stains

Restore-A-Deck Wood Stain: A Top Performer

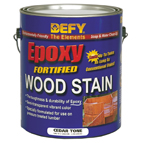
One of the newer, more impressive stains on the market right now is the Restore-A-Deck Wood Stain. It’s a water-based, synthetic resin, semi-transparent stain made with high-quality resins that bond firmly to the wood. A key advantage of this stain is its same-day application—you can apply it right after prepping your deck, saving both time and effort. While it may cost more than budget options, its long-term durability makes it a worthwhile investment.

Continue Reading
February 12, 2025 204 comments
Deck Staining 101

What Type of Deck Stain is Best For Me?

by Clay January 11, 2023
written by Clay

Deck Staining Tips 2023

As you may already know, there are three basic kinds of deck stains available on the market: clear, semi-transparent, and opaque stains. Although each type of stain will help to protect and prolong the life and looks of your deck, each different type of stain has a different reapplication rate and special characteristics.

Remember that before applying any stain, you need to clean your deck properly. Using an oxygen bleach and a garden hose as well as a little elbow grease will get your deck ready to be stained or sealed. Before applying any stain, perform a water test on the deck. Sprinkle water around on a few places on the deck itself. If the water does not sink in within a few seconds, then your deck will not absorb any stain. If your deck does not absorb water, you may want to invest in the best stain stripper or another chemical remover for your deck. You can also simply let it weather for a few more months and try the water test again.

Continue Reading

January 11, 2023 9 comments
Deck Cleaning

How to Clean a Deck (Don’t Use Chlorine Bleach) 2025

by Clay February 12, 2025
written by Clay

no-bleach

How to Clean a Wood Deck the Right Way in 2025

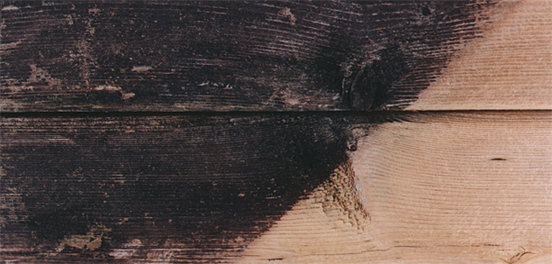
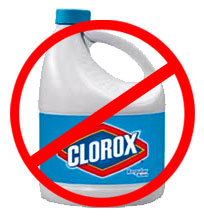
Many homeowners make the mistake of using chlorine bleach to clean their deck, thinking it will effectively remove mold and mildew. However, using bleach can cause long-term damage to your wood, leading to discoloration, splintering, and premature aging. The good news? There’s a safer and more effective way to clean your deck in 2025.

Why You Should Avoid Chlorine Bleach on Your Deck

Chlorine bleach (sodium hypochlorite) is a powerful sanitizer that kills bacteria and viruses, but it is not designed to clean wood decks. Here’s why using bleach is a bad idea:

  • It Damages Wood Fibers: Bleach destroys lignin, the natural glue that holds wood fibers together. This weakens the wood, causing it to splinter and turn an unattractive gray color.
  • It Doesn’t Kill Mold at the Root: Mold has deep roots in porous surfaces like wood. Bleach only removes mold on the surface, while the water content of bleach actually feeds the mold underneath. This often leads to faster, darker regrowth.
  • It Strips Deck Stains and Sealers: If your deck is stained or sealed, using bleach can cause premature failure, fading, and a blotchy appearance.
  • It Harms Surrounding Plants: Bleach runoff can kill grass, flowers, and landscaping around your deck, requiring extra precautions to protect your yard.

When it comes to chlorine bleach, think of it as a household cleaner for non-porous surfaces—kitchens and bathrooms—not for outdoor wood decks.

The Best Way to Clean Your Wood Deck in 2025

If you want a safe and effective way to clean your deck, use Restore-A-Deck Cleaner. This specialized wood cleaner is designed to remove dirt, mildew, and stains without harming the wood’s natural structure.

Why Restore-A-Deck Cleaner is the Best Choice:

? Safe for Wood: Unlike bleach, it preserves the lignin and fibers, keeping your deck strong and looking great.
? No Power Washer Needed: The formula is strong enough to clean the wood with just a garden hose. Simply apply, let it sit for 10–15 minutes, and rinse off.
? Safe for Plants and Grass: No need to cover or protect surrounding vegetation—it won’t cause harm.
? Prepares Wood for Staining: If you plan to stain or seal your deck, Restore-A-Deck Cleaner ensures a clean surface for the best adhesion and longevity.

How to Use Restore-A-Deck Cleaner:

  1. Mix the cleaner according to the instructions.
  2. Apply with a pump sprayer, brush, or roller.
  3. Let it sit for 10–15 minutes.
  4. Rinse thoroughly with a garden hose or pressure washer on low.

Final Thoughts

To keep your deck looking its best, avoid using chlorine bleach, which can do more harm than good. Instead, choose Restore-A-Deck Cleaner for a deep clean that protects your wood and extends the life of your deck.

For the best results, get Restore-A-Deck Cleaner online or at your local hardware store today!

cleaner

February 12, 2025 10 comments
Deck Cleaning

How to Use a Pressure Washer on a Wood Deck

by Clay June 18, 2009
written by Clay

pw2

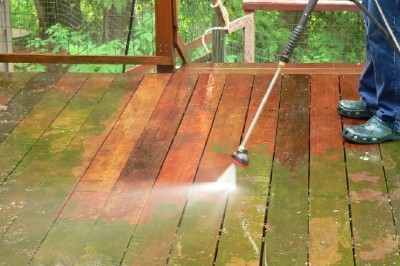
Pressure washing your deck is a great way to clean it up and prep it for a new coat of stain or sealer. Although some claim that a garden hose is safer for cleaning your deck, a garden hose alone doesn’t really provide enough pressure to really make a difference.

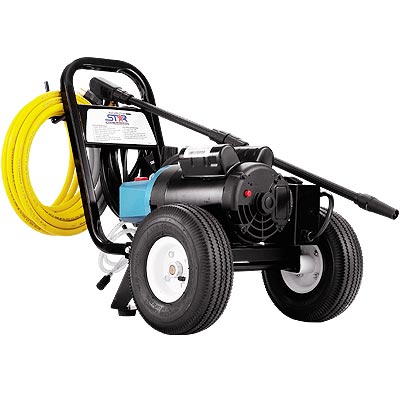
When using a pressure washer, you need to make sure that you don’t allow the tip to get too close to the wood. Getting too close will definitely cause damage. You should aim for around 1300-1500 PSI (pounds per square inch). Keep in mind that some pressure washers may go up to 3,000 PSI. This doesn’t mean that you can’t use these machines, just remember to use the widest tip (least pressure) available and hold the power washer 8-12 inches away from your decking surface to prevent damage.

Prior to using your power washer, make sure that you apply a deck cleaner or wood stain stripper to the entire surface. These powerful cleaners, along with the physical power of the pressure washer combine to restore your wood to a beautiful deck surface that will add to the beauty of your home.

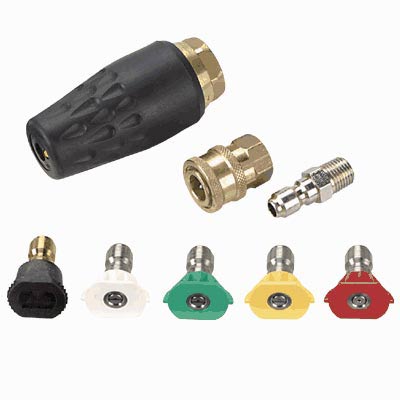
pressurewashertipsOnce a high quality wood cleaner or wood stripper has been applied to the wood, it’s time to use the pressure washer. First you need to choose the appropriate tip size. Nozzles, or tip sizes vary and the angle of the tip opening will determine the amount of pressure.  The smaller the angle, the more pressure you get. A zero degree tip is the most powerful and is not recommended for decks as you will probably be able to write your name in the wood with this tip.

Some power washers come with variable degree nozzles that you can manually twist to adjust the pressure. Just make sure that you use a wider tip so the pressure doesn’t damage the wood fibers.

One other thing. Be sure that you are strong enough to handle a power washer! Using a power washer can be very physically demanding so make sure that you are capable of using this tool, otherwise you risk doing damage to your deck and yourself! Remember, this is 1500 pounds of pressure.

It’s best not to try your power washer on your deck the first time you turn it on. Maybe start on on a concrete sidewalk until you get the hang of it. If the pressure surprises you, you may end up with an area of your deck that looks damaged and sunken in.

Once you get the hang of your power washer and feel comfortable enough to begin cleaning the deck, make sure that you go about cleaning a few inches in front of your feet in a long, pendulum like motion. Be sure to wear protective shoes, boots if at all possible, because 1500 pounds of pressure on your pinky toe will not feel good! Make sure you exaggerate your sweeping motion to avoid any lines in your deck surface.

pwRemember that you are merely trying to remove the dirt that is embedded into your wood, not strip the wood of anything else. The cleaner and/or stripper will take care of removing any previous finishes. The pressure washer simply washes everything away.
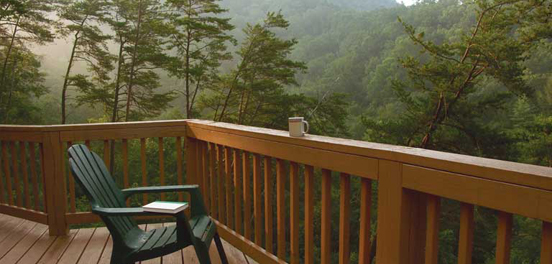
When you are finished power washing you should still be able to distinguish the wood’s grain and texture. Also, if you used a stain stripper, make sure to use an oxalic acid based product or a wood brightener before staining or sealing your wood. This will neutralize any leftover stripper so you don’t have problems with the stain lifting later on.

All in all, a power washer is a great way to bring your wooden deck back to life and when used properly, can make your cleaning job much faster and easier. Whether you simply want to spruce up your deck or you need to prep it for using a deck stain or clear deck sealer, a pressure washer is a great tool to add to your arsenal of home improvement tools.

Technorati Profile

June 18, 2009 1 comment
Deck Cleaning

Deck Cleaning and Repair

by Clay April 25, 2009
written by Clay

deck1

For many American homeowners, warm weather is an invitation to take the party out to the backyard patio or deck. Before you haul out the grill and light the tiki torches, however, take some time to do a little preventive maintenance.

“This is the time to do a few simple things that will make your deck last for years,” says home repair expert, Jim Rocchetta. “Plus, you’ll have your outdoor environment looking great before you and your friends head outside for those backyard get-togethers.”

The first step is a thorough inspection of the entire structure to ensure that it is safe and secure. Check for loose nails and screws, and either replace them or retighten them. Tighten any railings that have become loose. Then, look beneath the deck to confirm that beams and support poles remain in good working order. “If you find structural components that are loose, rotten or out of position, for your own safety, quit using the deck and call a pro in to fix the problem,” says Rocchetta.

As an additional safety precaution, replace broken or rotten deck boards before they break through completely. Boards that have become bowed or warped will also need to be replaced because they hold water and make the deck surface uneven, and create another potential safety hazard. If you’re replacing those boards with pressure-treated lumber, maximize the life of your deck by using stainless steel or high-grade galvanized fasteners designed to combat the corrosive effects of modern lumber treatment chemicals.

cleaner-smallOnce everything is secure, clean the deck boards with a biodegradable deck cleaner to remove dirt, mildew and algae. These environmentally friendly wood deck cleaners are now commonly available and actually perform better than previously popular outdoor wood cleaners such as bleach. Even if your deck is made from a composite material, most manufacturers still recommend a thorough annual cleaning. During the cleaning process, also take a little time to sand down any spots that have become rough or splintered.

Finally, ensure your deck looks great by protecting it from mildew and water damage with a high-quality finish and preservative. There are many good products on the market. “The best wood preservative products contain UV-resistant compounds which will really liven up the deck surface and add a high-degree of protection from the elements,” says Rocchetta.

A newer technology recently introduced to the market utilizes nano technology. These deck stains have nano-sized zinc oxide particles that are highly mold resistant and reflect UV rays without adding color to your wood. Since there are over 30 trillion zinc particles in a single square inch, they’re so small that they are invisible to the naked eye. This nano-technology is still in it’s infancy in the deck stain market, but there is already a product made by a company called Defy that has this technology. Check out Extreme Wood Stain for clear protection. Look for others in the future, but for now this one has the longest lifespan by far.

April 25, 2009 0 comment
Deck Staining 101

How to Stain Your Deck Like a Pro

by Clay May 3, 2009
written by Clay

1

Having spent my entire adult life working with paints and stains, it didn’t take long for me to figure out that homeowners who stain their own decks, for the most part, end up at the conclusion of their project, dissatisfied. Dissatisfied, after staining their deck, that their deck didn’t turn out looking as good as they thought (or hoped) that it would. Dissatisfied that after all of their hard work, all their pain staking labor, the stain doesn’t hold up and, almost over night, their beautiful project again begins to weather from nature’s elements.

Dissatisfied that, no matter what they have tried, the result is always the same…a lousy looking deck that seems to always look like it needs a little attention.The solution however, is not all that difficult…if you want your deck to look like a pro did it…to hold up to weather like a pro did it…then you have to stain it just like a pro would…and that means paying attention to 11 (no not 10, but 11) simple keys to success. 11 keys that, when followed, literally guarantee you of a great looking, long-lasting result but, when overlooked, can result in a disastrous conclusion. Beginning with…

1. Take your Time…

I can’t stress this point enough…with every step of the staining process…from the beginning to the end…take your time. When the project is completed and your tools are all cleaned up and put away, nothing will have had a greater impact on the quality of the job that you have done than this single point. It can mean allowing that new pressure treated lumber that you just built your new deck with to weather for a few months to dry out before staining…it can mean allowing the stain stripper that you are using to be left on the surface long enough to break down that old finish before you rinse it off. It can mean taking your time to not slop stain over anything and everything that gets in your way or it can mean waiting to start your project until the weather fore cast is favorable but, in all cases, during all the steps of the staining process, take your time to do it right!

2. Preparation…Preparation…Preparation…

This part you have probably heard before but I really can’t over emphasize its importance…preparation is key to the final result. All wood needs to be cleaned well before staining, whether it’s a brand new deck, that you just had built, or an older deck that’s been out in the weather and needs to be re-stained. Brand new lumber needs to be cleaned to remove “mill scale”, which is simply a crushing of the grain in the wood that takes place during the milling process and, left un-cleaned, can prevent stains from properly penetrating into the woods surface.

woodcleaner-smallOn an older deck, dirt, graying from the sun, mildew and old stains all need to be removed prior to staining. Sodium Percarbonate cleaners, also known as oxygenated bleaches, are a great choice for this step. They are highly effective at cleaning the wood yet they won’t harm plant life and vegetation. Best of all, they won’t hurt you either…their soapy consistency won’t burn your skin.

stripper1gal-smallIf there is a build up of old stains on the deck then the job gets a little tougher but not impossible…instead of a sodium percarbonate cleaner you’ll need to use a stain stripper. Strippers are a little more caustic so follow the directions carefully, but they work great and will remove most weathered stains in a single application.

Lastly, if there are small spots of stain that wouldn’t come off during the cleaning process, once the deck has dried, they should sand off fairly easily using a palm-type sander. Left on the deck, those spots of stain will show through the new finish and detract from the deck’s final appearance. Some stain manufacturers offer a free instructional DVD to help walk you through this entire process…they’re a terrific tool to use to be sure that you do it right the first time. Here’s an example:

3. Brighteners are Beautiful…

brightener-smallIn the staining process, no step is skipped more than this one yet it is, by far, the easiest step to do and it will have a dramatic effect on the final results. Brighteners are easy to apply, they help open up the surface of the wood to improve penetration, they neutralize any stain strippers that were used, and they restore the appearance of old weathered wood to the way it looked when it was brand new. Now that’s a lot of things for one product to accomplish but brighteners will do all of that so don’t skip using them.

And remember I said that they are easy to use…simply spray them on, wait a few minutes, and rinse them off…no scrubbing, no “elbow grease” needed…no reason to not use them!

4. Rinse like Mad…

Use lots and lots of water after using any cleaning chemicals. In spite of the fact that some of these chemicals can seem safe and harmless, they all need to be rinsed off extremely well after they are used. Left in the wood, these chemicals can y resurface over time and begin attacking, and breaking down the new stain so, once you are done cleaning, rinse the deck like mad to get all of the chemicals out of the wood.

5. Stay Away from the Cheap Stuff…

Alright…the deck is cleaned, dry, and ready to be stained…now is not the time to scrimp…when you go to buy the stain that you plan to use, stay away from the cheap stuff! You always get what you pay for…better ingredients cost more money. If you expect premium results then you’ll need to buy a premium product. There is a difference in quality when it comes to resins, pigments, mildecides and many of the other materials that make up a gallon of wood stain so…stay away from the cheap stuff if you expect it to last.

6. Take a Look at Waterborne Stains…

epoxy-smallWater based stains have gotten to be really good products, so, if you have been reluctant to look at them in the past, don’t be reluctant any longer. Air quality regulations have forced manufacturers to really focus on these products and I believe that they are now better, more durable and longer lasting than conventional oil-based alternatives. Besides, they offer some real advantages to the user…they clean up with soap and water, there are no nasty solvents to breathe, they have significantly better resistance to weather, the wood doesn’t need to be completely dry to use them, they dry more quickly than solvents, rain is not as big of an issue with them and they are much easier on good old’ mother earth.

In addition, some of the waterborne stains are synthetic as well, such as the Defy deck stains. This is a nice feature in that synthetic products will be far less susceptible to the growth of mold, mildew and algae so, if you’re in area with a fair amount of moisture and humidity, there could be some real advantages in you considering a waterborne synthetic stain. After all, you wouldn’t use oil based products on your house…why would you use them on your deck…

7. Read the Can…Follow the Directions…

Every manufacturer’s product can be a little different so always read the label for directions. It only takes a few minutes but it will insure that you have all of the right information before you get started. How many coats of stain to apply…how long to wait between coats…how long to wait after cleaning…how long to allow wood to weather. There are any number of variations of answers to these questions and more…read the label first and you’ll be likely to get it right the first time.

8. More IS NOT always Better…

Decks are best stained with a semi-transparent product…these types of products allow the natural grain of the wood to show through, allow the wood to naturally breathe vapor through it, and, when weathered, they are easily cleaned off and reapplied. But don’t be fooled…with semi-transparent stains, more is not better. Pay attention to the manufacturers directions and don’t over apply these products…you’ll end up with a beautiful, shiny finish that will probably peel off over time. When too much stained is applied a film can form, much like paint, that will longer allow vapor to pass through it. When this happens the end result will be peeling and that’s a real mess so…only apply as much stain as the wood can easily absorb.

9. The Paint Brush is Still King…

There are a lot of different ways to put the stain down with…sprayer and roller being two popular methods…but in the end, keep a paint brush at hand as…the paint brush is still king! Nothing will work the stain deep in to the pours of a board like a agitation and friction caused by a paint brush so, if you are spraying or rolling the material on, always back-brush it in while the stain is still wet and you’ll achieve much better penetration in to the wood.

10. Remember…Take Your Time…

I told you at the start of this article to take your time…keep taking your time all the way through till the end. And when your project is finally done…take a little extra time before you start using it. Let your deck dry out good before putting it back in use…let the stain cure out a bit before subjecting it to the rigors of patio furniture and foot traffic. You’ve done everything right to this point…don’t give up at the end.

11. How about a Little Maintenance…

Oh yes…and one final thing…don’t forget a little maintenance…a little TLC…a small amount of effort can keep your deck looking great longer. Just as you would wash the dirt off of your car, wash down the surface of your deck every now and then to keep leaves and dirt from doing damage to the finish. If things start to break and the stain starts to show signs of graying or loosing its color, it can be easily cleaned up with a little wood brightener and, with the application of a light maintenance coat of stain, your deck can look new again.

So that’s it…that’s all there is to it. Eleven keys to deck staining success. Go ahead and try them…try the eleven keys for yourself…see what the results are when you set out on your next project to do it like a pro. You may just surprise yourself!

*Helpful Tips

You can really speed the process up by using a scrub brush on the horizontal boards. These brushes can be found in the cleaning section of most home improvement stores. Get the type that can be attached to a 4 foot extension pole and now staining the surface of the deck will go nearly as fast as mopping your floor!

When staining the deck rails take care not to splatter stain on the deck surface below as it will most likely leave unsightly darker spots when you are done. The easiest way to avoid this problem is to cover the deck below the rails as you work. I use the cardboard from the box the stain came in and cut out notches in the cardboard so it will fit snugly around the rail posts.~

May 3, 2009 19 comments

Deck Stain Supply Stores

Home Works Supply
The Sealer Store
Defy Stains
Restore-A-Deck
TWP 100 Series

Deck Restoration Tips
Glen Haege Deck Restoration Articles

Recent Posts

  • Stain Your Deck in the Spring 2025
  • Best Deck Stain and Sealers 2025
  • The Best Deck Stains 2025
  • The Best Epoxy Coating for Garages
  • Water Based Deck Stains 2025
  • Types of Concrete Sealers 2025
  • Deck Staining Myths and Tips 2025
  • Restore-A-Deck’s Two Step Deck Cleaning Products
  • How To Stain Your Deck Faster and With The Proper Tools!
  • Where to Buy Defy Deck Stain in Canada?

Categories

  • Deck Cleaning
  • deck stain
  • Deck Stain Reviews
  • Deck Staining 101
  • Featured
  • Gray Weathered Deck
  • Uncategorized

RSS Deck Stain Ratings

  • Deck Stain Colors: Best Options by Type, Brand & Wood Style
  • All Deck Stains Reviewed by Scott Paul
  • How to Stain a Deck For Best Results
  • TWP 100 Pro Series Wood and Deck Stain Review 2025
  • Armstrong Clark Wood Deck Stain Review 2025
  • Restore-A-Deck Wood Stain Review
  • My Best Deck Stains in 2025: Pro Reviews
  • Reviews & Advice To Get Your Deck Done Right!
  • Types of Deck Stains in 2025: Explained
  • Best Deck Cleaners of 2025: Reviews & Expert Tips for Cleaning Decks

RSS Concrete Sealer Reviews

  • How to Seal Brick Pavers 2025
  • Best Stamped Concrete Sealers for 2025 – Wet Look, Gloss & Matte Options
  • Best Epoxy Floor Coatings for 2025: Pro Reviewed
  • Find the Best Concrete Sealer for 2025: Expert Reviews
  • Best Brick Paver Sealers – Wet Look, Gloss, and Natural Finish Reviews (2025)
  • SuperSeal30 Paver and Concrete Sealer Review 2025
  • SuperSeal25 Semi-Gloss Paver and Concrete Sealer Review
  • Find the Best Exposed Aggregate Concrete Sealer
  • Concrete Sealer Reviews & Advice for 2025
  • Concrete Surfaces and Which Sealer to Use in 2025
Best Deck Stain 2021 pressure washer nano technology wood deck protection clear deck stain Deck Cleaning how to clean a wood deck opaque deck stains wood s deck cleaning tips 2020 Best Deck Stains 2022 deck stain 2020 Canada deck stain types deck sealers Deck Stain Tips 2021 Deck Stain 2022 deck staining tips 2020 outdoor deck protection Deck Stain Reviews 2020 semi-transparent deck stains ipe stain best epoxy coating 2020 defy stain deck brightener Deck Stain Reviews 2021 clean deck how to stain your deck clear deck stains Best Deck Stain 2020 deck preservative deck stains 2020 wood stain cedar tone prep wood deck deck care deck nano particles deck rejuvination deck stain TWP extreme stain deck stains weathered deck deck cleaners 2020

Archives

  • February 2020
  • January 2020
  • March 2017
  • March 2012
  • February 2012
  • June 2011
  • May 2011
  • April 2011
  • March 2011
  • February 2011
  • January 2011
  • March 2010
  • February 2010
  • June 2009
  • April 2009

Categories

  • Deck Cleaning
  • deck stain
  • Deck Stain Reviews
  • Deck Staining 101
  • Featured
  • Gray Weathered Deck
  • Uncategorized
Footer Logo

@2022 - All Right Reserved.


Back To Top
Deck Stain Guide
  • Home
  • About
  • Deck Staining 101
  • Deck Cleaning
  • Deck Stain Reviews
Cleantalk Pixel